If you are looking to escape the hustle (and maybe a snowstorm, lol) for a week of wildlife and relaxation, Costa Rica may be the ultimate destination. I absolutely love it here! Let’s chat about the gear I used and a quick breakdown of my seven-day “avoid the tourists” road trip.
I will admit, it was overly ambitious to drive hours to all these spots in just one week, but I saw it as a scouting mission for you guys! If you’re planning a similar adventure, I recommend choosing two main regions for a week so you can slow down, explore more deeply, and actually enjoy the experience. Be sure to check out my video below for some of the visuals from the trip.
Camera and Gear Recommendations
I traveled with two cameras, and my workhorse for almost everything was the mighty Nikon Z8. Thanks to its fully electronic silent shutter, I could completely disable shutter sounds, which is crucial when working around skittish wildlife. The Z8 also shoots 4K at 120 frames per second, allowing for beautifully smooth slow-motion footage of birds in flight. It’s rugged, weather-sealed, and comfortable enough to carry all day in Costa Rica’s heat and humidity.
My backup camera was the Nikon Zf, which is more than capable of stepping in if needed. I actually used it as my main video camera, since it shoots 4K at 60 frames per second and performs exceptionally well in low light. It was perfect for my nighttime rainforest walks.
Now, although most recommend a 600mm, my go-to lens was the Nikon Z 400mm 4.5S, and wow, what a lens! It was the perfect balance between performance and portability. The Nikon 180-600mm would have been more versatile, but personally, I like my back muscles.
I was able to use DX crop mode on the Z8 to capture 20MP photos at an effective 560mm. For video, the Z8 can shoot DX 4k at 120p video, giving me a whopping 2.3 times crop! That translates to a 920mm equivalent for some truly epic wildlife footage. For close-ups, my “macro” lens was the budget-friendly Nikon 70-180mm, which can focus very close at 70mm, offering a 1:1.3 magnification (0.73x). It worked beautifully for frogs, insects, and flowers.
If you are not a Nikon shooter, here are some camera and lens combos that would feel right at home in Costa Rica. The key themes to look for are fast autofocus, solid weather sealing, and enough reach to handle distant wildlife. Size and weight are huge considerations, so start there! Also, if video is important to you, choose a camera with in-body image stabilization and a great viewfinder.
Sony shooters have a lot of options. If resolution and speed are your priorities, Sony’s high-megapixel bodies like the a1, a7R V, or the compact a7CR deliver plenty of detail for wildlife and landscapes alike. For a more balanced, do-it-all option, the a7 IV or new a7 V hit a sweet spot between photo and video performance. On a tighter budget? Check out Sony’s APS-C lineup, especially the a6700, which offers impressive autofocus and reach in a smaller, more affordable package. When it comes to lenses, the Sony 200–600mm has become a staple for bird and wildlife photographers, while budget-conscious shooters can find excellent alternatives from Sigma and Tamron without sacrificing too much performance. Both offer great options.
If your goal is to downsize your entire kit, OM System (formerly Olympus) is perfect for Costa Rica! I have to admit, I was always skeptical of Micro Four-Thirds, and then I tried it! These cameras are basically waterproof, and thanks to the Micro Four Thirds sensor, you’ll get twice the reach of a full-frame sensor. Birders often gravitate toward the 300mm f/4, which provides a 600mm full-frame equivalent field of view in a relatively small package. For maximum flexibility, the 150–600mm delivers a massive 300–1200mm equivalent range, while serious pros will appreciate the incredible 150–400mm f/4.5, complete with a built-in teleconverter. The flagship OM-1 is a favorite among wildlife photographers for its speed and reliability, while the OM-5 Mark II offers a more travel-friendly and budget-conscious option. On the Panasonic Lumix side, check out the powerhouse Lumix G9 II. Throw the Leica 100-400mm on that puppy, and you’re good to go!
Canon also offers some solid choices with the Canon R5 and R5II, offering a high-resolution option and excellent autofocus performance. The Canon R6II also adds tons of video features at a reduced price. However, for birds, I’d actually go with the Canon R7 since its APS-C sensor will give you 1.6 times more reach than the full-frame cameras. There aren’t many third-party options for Canon, so if the RF lenses stretch beyond your budget, adapting older EF lenses with Canon’s adapter may be a cost-effective solution.
Fujifilm shooters can use the XF 150-600mm. However, this is a variable aperture lens, which means it is a f/5.6 at 150mm and f/8 at 600mm. This isn’t a problem if you’re shooting Bison in Yellowstone; however, in Costa Rica, you’ll want to gather as much light as possible on your long end. It can get pretty dark in the canopy. Personally, I’d choose the 100-400mm.
With all this said, remember that it’s not about the gear, but the skill of the photographer. Practice on your backyard birds to figure out which autofocus and other camera settings work best.
Summary of My Overly Packed Itinerary
- Arrival & Transport: Landed in Alajuela (near the capital of San Jose). Pro Tip: Rent from a local business like Adobe Rental or Jumbocar to avoid hidden fees often found with big chains (Bring along printed proof of your credit card coverage in case). While my small car did the job, a 4×4 is highly recommended for some of the roads.
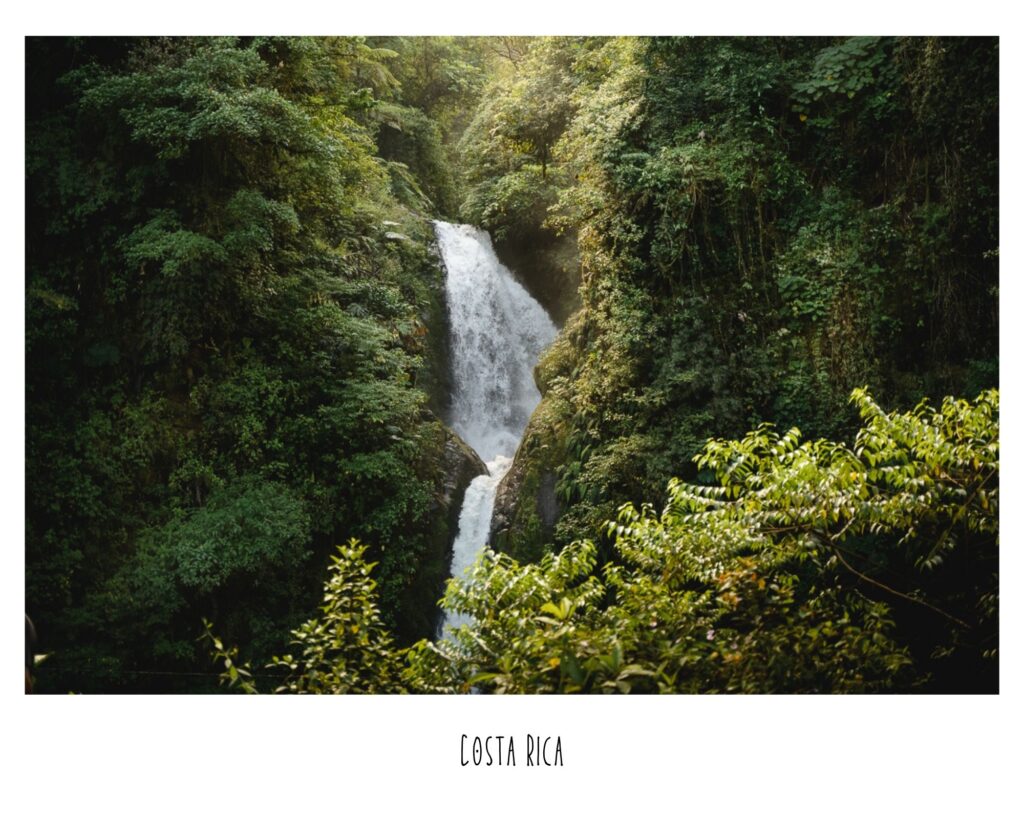
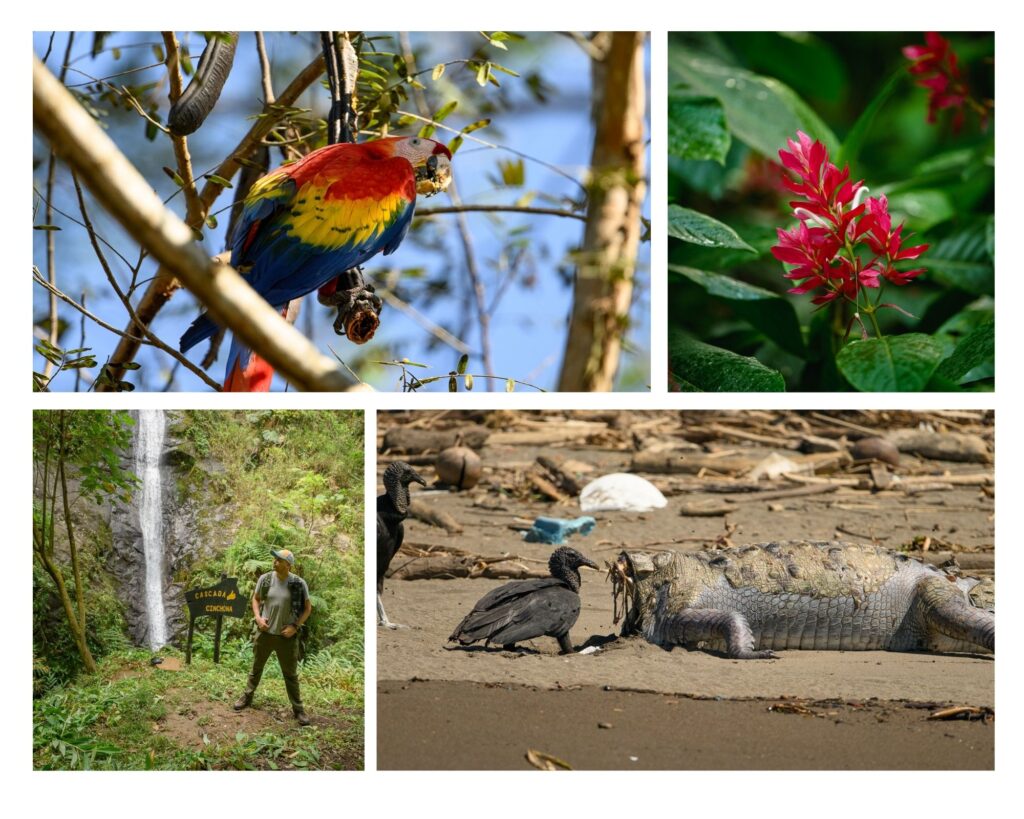
- Chinchona Waterfalls: Started by heading north. Skipped the crowded touristy spots and visited the family-run Chinchona Waterfalls. For a small fee, you can hike to stunning cascades—just be prepared for a strenuous climb back up! My best shots of hummingbirds were here, right at the entrance.
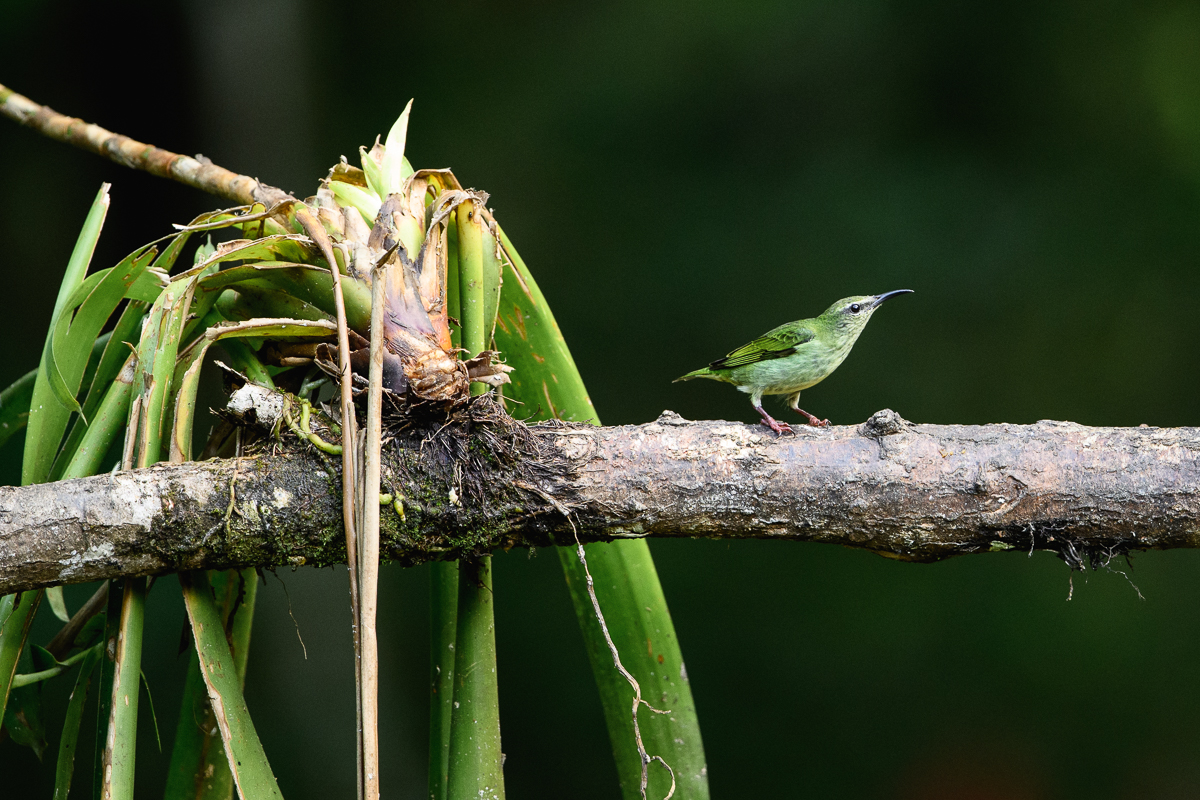
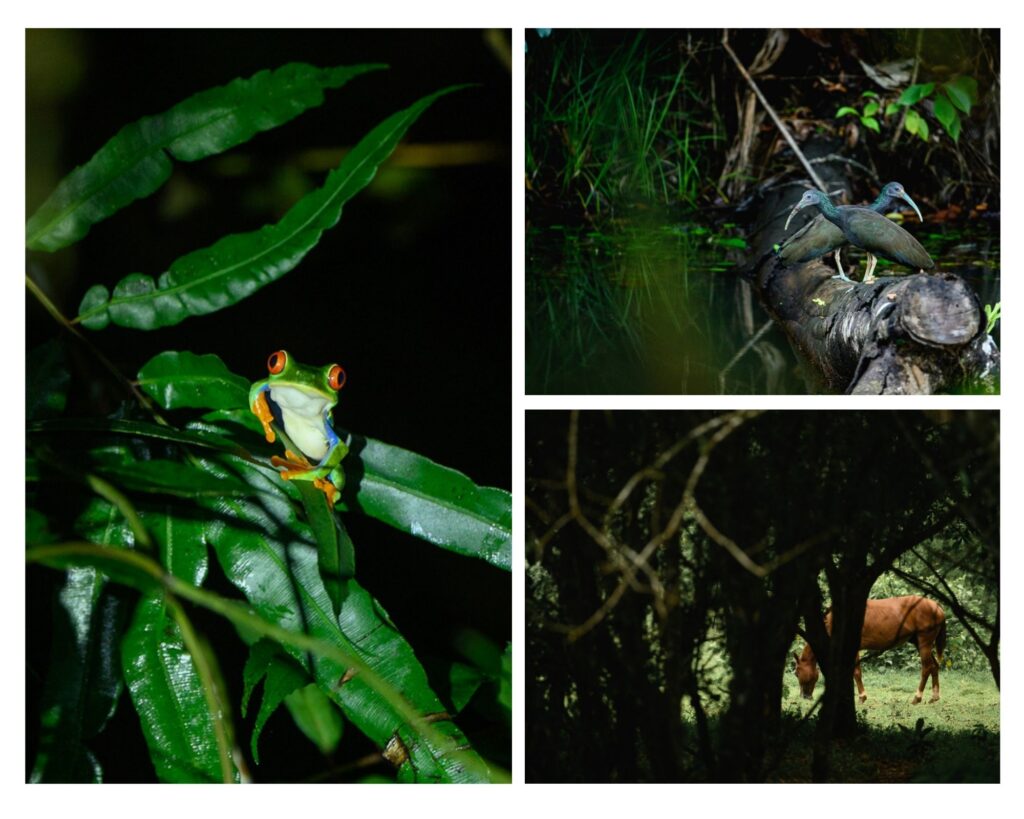
- The Birding Paradise (Laguna del Lagarto): Headed further north toward the Nicaraguan border. This area is a mecca for birders. The lodge offers night hikes (mine was with Henry) to see frogs and nocturnal life. Early morning sessions over breakfast seem like cheating. You’ll easily see toucans, King Vultures, kingfishers, crocs, lizards, creepers and tanagers. My accommodations were simple, but I was here for the birds.
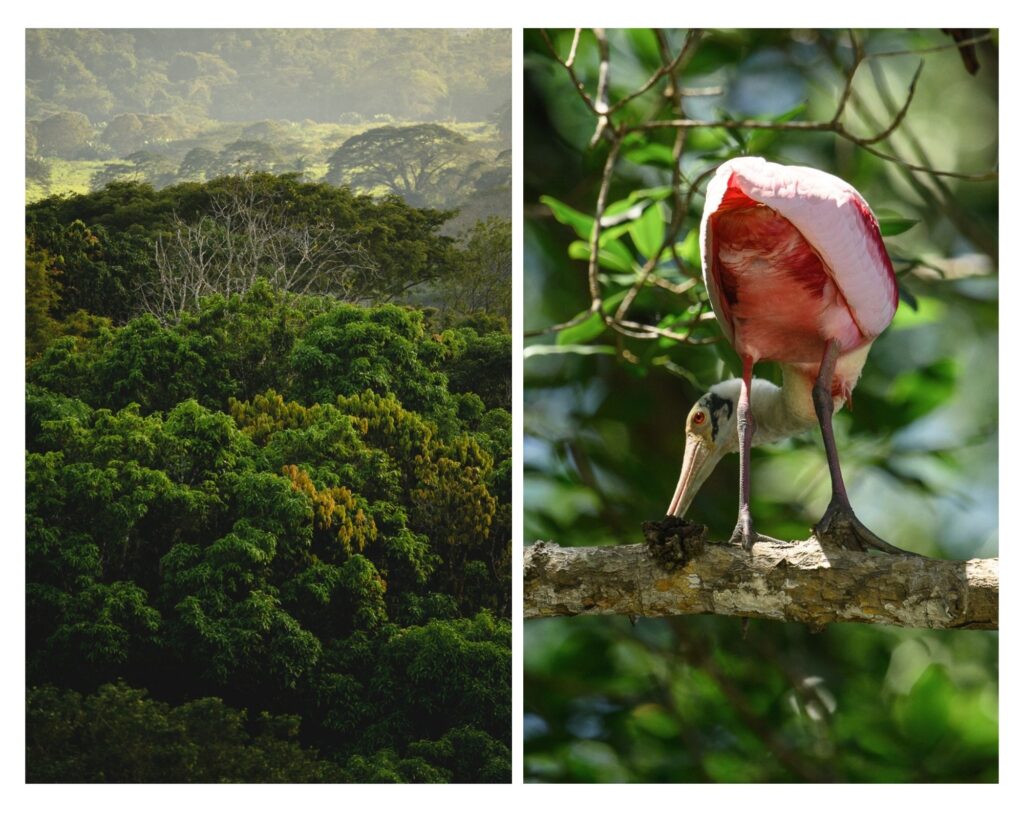
- Sleeping in the Rainforest: (Chilamate Rainforest Lodge): I drove south and decided to check out the Sarapiqui area. My lodge was smack dab in the forest which was fun to film but not fun to sleep. The rooms were ‘meh’ and with all the humidity, I missed my AC back in NJ. However, I had the rainforest on the grounds all to myself which made filming easy. Howler monkeys galore here.
- The West Coast (Tarcoles Birding Hotel): Drove to the Tarcoles area, famous for the Crocodile Bridge. While a bit touristy, a riverboat tour is a must for seeing crocodiles up close. I was pleasantly surprised how many birds I captured! The highlight was seeing my first wild macaws. That’s a lie, the highlight was seeing a vulture eating the INSIDE OF A CROC! They don’t show you that on TV. My hotel was quiet and relaxing with a pool.
- The Search for the Quetzal (San Gerardo de Dota): My final area was a trip to the high-altitude cloud forests south of the capitol, San Jose. The temperature drops significantly here, creating a misty, magical atmosphere perfect for finding the “Muppet bird”—the Resplendent Quetzal. That’s basically why everyone is here. The big groups looking for the bird made it feel a little less special, but seeing the Quetzal made it all worth it.

Travel Tips:
- The humidity will wreak havoc on your gear if you are not mindful. If you’re staying in an air conditioned room, keep your gear packed in your bag and warm (I like to sleep with mine). One trick is if your bathroom has a window, make the bathroom an “outdoor” space and keep your gear bag in there. Another is to use a blow dryer to heat your camera surface up to prevent condensation.
- Bring along sensor and lens cleaning kits like these.
- Birds probably see you and mammals will hear and smell you a mile away (ew). But I wish I had packed a green poncho instead of the blue one that screamed “TOURIST!”
- Double the GPS driving times if your drives are long and though Costa Rican traffic. Single lane highways are rough especially if you’re used to the New Jersey Turnpike.
I hope that was helpful, and if you’re heading to Costa Rica, let me know on Instagram or in the comments!